
The People Page
The People page is your central hub for all contacts. You can switch between two views depending on how you prefer to work:
- Grid View — a spreadsheet-style list, ideal for sorting and scanning large contact lists
- Tile View — a card-based layout, better for a visual snapshot of each contact
Customizing Your Columns
Click Customize View (top right of the grid) to choose which columns are displayed. Available columns include:
Name, Email, Phone, Company, Website, Originated By, Lead Source, Contact Type, Tags, Current Lease Expiration Date, Current SF Occupied.
Select the columns most relevant to your workflow and the grid will update immediately.
Contact Actions (Kebab Menu)
Click the three-dot menu on any contact row to:
- Download vCard — save contact info to your phone or email client
- Send Email — open a new email to that contact
- Delete — remove the contact
Options Menu
The Options dropdown (top right) gives you bulk and export actions:
- Import Contacts (coming soon) — import contacts from Excel
- Assign Tags — tag multiple contacts at once
- Export to Excel (coming soon) — export your contact list
- Send Bulk Email (coming soon)
Importing Contacts
You can import contacts in bulk using an Excel file.
To import contacts:
- Go to the People page
- Click Options in the top right
- Select Contacts Import
- Follow the on-screen instructions to upload your Excel file and review the import results
After the import completes, review the results screen to confirm contacts were added correctly and resolve any flagged duplicates or incomplete records.
You can also import contacts from Outlook by connecting your Microsoft account under User Profile > Settings > Linked Account.
Note: Bulk import from Excel is coming soon and is not available in the current version.
Tile View
Tile view displays contacts as cards. All the same filtering, sorting, and options from Grid View are available here — choose whichever layout suits your preference.
Assigning Tags in Bulk
To tag multiple contacts at once:
- Select contacts using the checkboxes on the left
- Click Options > Assign Tags
- In the pop-up, add My Custom Tags or House Tags as needed
- Click Apply
You'll see a confirmation message, and tags will be immediately visible on each contact profile.
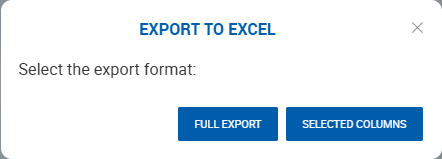
Exporting Contacts
When available, click Options > Export to Excel and choose one of two options:
- Export Current View — exports only the columns currently visible in your grid, respecting any active filters and sorting
- Export All Data — exports every available contact field, also respecting active filters and sorting
Advanced Contact Search
Use the Advanced Search on the People page to find contacts using detailed filters.
General filters: Company Name, Street Address, City, State/Province, Zip Code, Permissions, Billing Contact, Prospect Status, Originated By, Lead Source, Tags
Requirement-based filters (for finding buyers and tenants):
| Requirement Type | Available Filters |
|---|---|
| Tenants | Property Type, Price Range (min/max), SF Range (min/max), Submarket, Term, Industry |
| Buyers | Property Type, Size, Price Range, Submarket, Type of Buyer (Cash, Financing, 1031) |
Adding a New Contact
Click + Contact to open the Create Contact form. You'll fill in details across two steps:
Step 1 — Choose Contact Type: Client, Prospect, Broker, Vendor, Owner, or Other
Step 2 — Contact Info & Details: Fill in name, email, phone numbers, company, and address. Additional fields appear depending on the contact type selected:
| Contact Type | Additional Fields |
|---|---|
| Client / Prospect | Client Type, Billing Contact, Prospect Status, Requirements |
| Vendor | Vendor Type (e.g. Lawyer, Lender, Architect, Title Agent) |
| Broker | Tax ID Number |
All contact types allow you to add:
- Social media profiles
- Lead Source and Originated By
- Reports To, Department, Birthday, Work Anniversary, Assistant
- Custom Tags (My Tags and House Tags)
- Linked Contacts (to connect related contacts to each other)
Prospect Status options (for Prospects only): New → Contacted → Actively Engaged → Qualified → Meeting Scheduled → Proposal Sent → Negotiation → Converted → Follow-Up → Inactive → Lost
Editing a Contact
Open any contact and click Edit. The Edit Contact form includes everything from the Add Contact form, plus two additional tabs:
- Linked Properties — view and manage properties connected to this contact
- Former Companies — track previous company associations